No edit summary |
m (Reverted edits by Dmaster624 (talk | block) to last version by 99.166.145.120) |
||
| (41 intermediate revisions by 19 users not shown) | |||
| Line 1: | Line 1: | ||
| + | {{CreatureInfobox |
||
| + | | image = {{PAGENAME}}.png |
||
| + | | cretype = Boss |
||
| + | | rank = 8 |
||
| + | | heal = 6,000 |
||
| + | | crecla = Undead |
||
| + | | school = Death |
||
| + | | damperpip = 110 |
||
| + | | damsch = Death |
||
| + | | minion = Stomper |
||
| + | | minion2 = Stomper |
||
| + | | minion3 = Stomper |
||
| + | | world = Wizard City |
||
| + | | location = Colossus Boulevard |
||
| + | | subloc1 = Briskbreeze Tower |
||
| + | | subloc2 = |
||
| + | | subloc3 = |
||
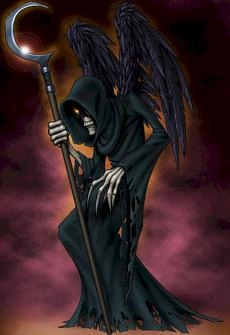
| + | | descrip = Orrick Nightglider is a [[Wraith]], found on the last floor of the [[Briskbreeze Tower]]. |
||
| + | He is a boss with the cheating capability. For example, he can: cast two spells in the same round, interrupt spells, destroy traps, he can cast spells that don't use pips, cast a [[Meteor Strike]] causing 750 [[Image:Fire.png]] [[Image:Damage.png]] and an [[Earthquake]] that does 750 [[Image:Myth.png]] [[Image:Damage.png]]. When he casts a [[Heck Hound]], it doesn't use pips, but still does 1680 [[Image:Fire.png]] [[Image:Damage.png]] over 3 Rounds. He can also interrupt your attacks to put a Tower Shield on himself. |
||
| + | After his health gets down to 4,000, he will summon three [[Stomper]]s. Stompers are Black Colossus' that use Balance Spells, and will use all types of protections and charms on Orrick. |
||
| − | {| align="right" width="260px" border="1" cellpadding="3" style="background:#EEEEEE; border-collapse:collapse;" |
||
| − | !style="text-align:center;"|<u>{{PAGENAME}} at a Glance:</u> |
||
| − | |- |
||
| − | |colspan="2"|[[image:{{PAGENAME}}1.jpg|230x380px|center]]{|border="0" cellpadding="0" style="background:#EEEEEE; border-collapse:collapse;"| |
||
| − | | |
||
| − | |- |
||
| − | |'''Rank:''' 8 ''Boss'' |
||
| − | |- |
||
| − | |'''Health:''' 6,000 |
||
| − | |- |
||
| − | |'''Creature Class:''' Undead |
||
| − | |- |
||
| − | |'''School:''' [[image:Death.gif|25x25px]] [[:Category:Death|Death]] |
||
| − | |- |
||
| − | |'''Boost:''' 80% [[image:Life.gif|25x25px]] [[:Category:Life|Life]] |
||
| − | |- |
||
| − | |'''Resist:''' 50% [[image:Death.gif|25x25px]] [[:Category:Death|Death]] |
||
| − | |- |
||
| − | |'''Physical Attack:''' 110 per pip [[image:Death.gif|25x25px]] [[:Category:Death|Death]] |
||
| − | |- |
||
| − | |'''Minion:''' Stomper(Summons) |
||
| − | |} |
||
| − | |} |
||
| + | Your best bet to beating him is to prepare everyone in your group to each do a big attack on him killing him in one round so he won't summon the minions. While 3 people are preparing to do a big attack on him a Fire Wizard needs to put a Fire Dispel on him every round to prevent his high damage [[Meteor Strike]] and [[Heck Hound]]. He has grandmaster ring drops. |
||
| − | == Description == |
||
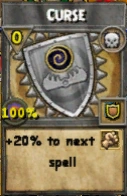
| + | | spell1 = Curse |
||
| − | Orrik Nightglider is a [[Wraith]], found on the last floor of the [[Briskbreeze Tower]], he is very powerful and will cheat to win. He can use a lot of high spells, cast double spells (two spells in a round), interrupt spells, destroy any trap used, cast spells that don't use pips, cast a [[Meteor Strike]] causing 750 Fire Damage and a [[Earthquake]] with 750 Myth Damage, but won't removing [[Charms]]. |
||
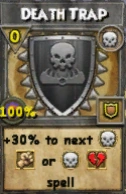
| + | | spell2 = Death Trap |
||
| − | After when he's defeated, he said any time horrible happens in the [[Spiral]], and [[Krokotopia]] is the next.\Spells Known |
||
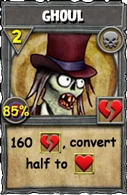
| + | | spell3 = Ghoul |
||
| − | {|border="0" |
||
| + | | spell4 = Banshee |
||
| − | | |
||
| + | | spell5 = Vampire |
||
| − | [[Image:Weakness.png|127x195px|link=Weakness]] |
||
| + | | spell6 = Skeletal Pirate (Spell) |
||
| − | [[Image:Curse.png|127x195px|link=Curse]] |
||
| + | | spell7 = Scarecrow |
||
| − | [[Image:Death Trap.png|127x195px|link=Death Trap]] |
||
| + | | spell8 = Tower Shield |
||
| − | [[Image:Ghoul.png|127x195px|link=Ghoul]] |
||
| + | | spell9 = Weakness |
||
| − | [[Image:Banshee.png|127x195px|link=Banshee]] |
||
| + | | spell10 = Smoke Screen |
||
| − | [[Image:Vampire.png|127x195px|link=Vampire]] |
||
| + | | spell11 = Fire Elf |
||
| − | [[Image:Skeletal Pirate.png|127x195px|link=Skeletal Pirate]] |
||
| + | | spell12 = Ice Wyvern |
||
| − | [[Image:Wizard101_09041307_1239635937.jpg|127x195px|link=Scarecrow]] |
||
| + | | spell13 = Meteor Strike |
||
| − | [[Image:Fire Elf.png|127x195px|link=Fire Elf]] |
||
| + | | spell14 = Heck Hound |
||
| − | [[Image:Meteor Strike.png|127x195px|link=Meteor Strike]] |
||
| + | | spell15 = Earthquake |
||
| − | [[Image:Smoke Screen.png|127x195px|link=Smoke Screen]] |
||
| + | | gold = |
||
| − | [[Image:Heck Hound.png|127x195px|link=Heckhound]] |
||
| + | | hat1 = Wayfinder Helmet |
||
| − | [[Image:Earthquake.png|127x195px|link=Earthquake]] |
||
| + | | hat2 = |
||
| − | [[File:Tower_Shield.png|link=Tower Shield]] |
||
| + | | hat3 = |
||
| − | |||
| + | | hat4 = |
||
| − | == Items Dropped == |
||
| + | | hat5 = |
||
| − | :''Gold'': |
||
| + | | hat6 = |
||
| − | ::?-? |
||
| + | | hat7 = |
||
| − | |||
| + | | hat8 = |
||
| − | :''Hats'': |
||
| + | | hat9 = |
||
| − | :: |
||
| + | | hat10 = |
||
| − | |||
| + | | robe1 = |
||
| − | :''Robes'': |
||
| + | | robe2 = |
||
| − | :: |
||
| + | | robe3 = |
||
| − | |||
| + | | robe4 = |
||
| − | :''Boots'': |
||
| + | | robe5 = |
||
| − | :: |
||
| + | | robe6 = |
||
| − | |||
| + | | robe7 = |
||
| − | :''Wands'': |
||
| + | | robe8 = |
||
| − | :: |
||
| + | | robe9 = |
||
| − | |||
| + | | robe10 = |
||
| − | :''Athames'': |
||
| + | | boots1 = |
||
| − | :: |
||
| + | | boots2 = |
||
| − | |||
| + | | boots3 = |
||
| − | :''Amulets'': |
||
| + | | boots4 = |
||
| − | :: |
||
| + | | boots5 = |
||
| − | |||
| + | | boots6 = |
||
| − | :''Rings'': |
||
| + | | boots7 = |
||
| − | ::[[Simmering Sigil]] |
||
| + | | boots8 = |
||
| − | ::[[Ring of Winterbite]] |
||
| + | | boots9 = |
||
| − | ::[[Stormtossed Band]] |
||
| + | | boots10 = |
||
| − | ::[[Philosopher's Stone]] |
||
| + | | wand1 = |
||
| − | ::[[Seal of Salvation]] |
||
| + | | wand2 = |
||
| − | ::[[Signet of Sepulcher]] |
||
| + | | wand3 = |
||
| − | ::[[Jewel of Nullification]] |
||
| + | | wand4 = |
||
| − | |||
| + | | wand5 = |
||
| − | :''Decks'': |
||
| + | | wand6 = |
||
| − | :: |
||
| + | | wand7 = |
||
| − | |||
| + | | wand8 = |
||
| − | :''Pets'': |
||
| + | | wand9 = |
||
| − | :: |
||
| + | | wand10= |
||
| − | |||
| + | | athame1 = |
||
| − | :''House'': |
||
| + | | athame2 = |
||
| − | ::[[Long Broke Wall]] |
||
| + | | athame3 = |
||
| − | |||
| + | | athame4 = |
||
| − | :''Treasure Cards'' |
||
| + | | athame5 = |
||
| − | ::[[Scarecrow]] |
||
| + | | athame6 = |
||
| − | ::[[Colossus]] |
||
| + | | athame7 = |
||
| − | |||
| + | | athame8 = |
||
| − | :''Reagent'' |
||
| + | | athame9 = |
||
| − | :: |
||
| + | | athame10 = |
||
| − | |} |
||
| + | | amulet1 = |
||
| + | | amulet2 = |
||
| + | | amulet3 = |
||
| + | | amulet4 = |
||
| + | | amulet5 = |
||
| + | | amulet6 = |
||
| + | | amulet7 = |
||
| + | | amulet8 = |
||
| + | | amulet9 = |
||
| + | | amulet10 = |
||
| + | | ring1 = Simmering Sigil |
||
| + | | ring2 = Ring of Winterbite |
||
| + | | ring3 = Stormtossed Band |
||
| + | | ring4 = Philosopher's Stone |
||
| + | | ring5 = Seal of Salvation |
||
| + | | ring6 = Signet of Sepulcher |
||
| + | | ring7 = Jewel of Nullification |
||
| + | | ring8 = |
||
| + | | ring9 = |
||
| + | | ring10 = |
||
| + | | deck1 = |
||
| + | | deck2 = |
||
| + | | deck3 = |
||
| + | | deck5 = |
||
| + | | deck6 = |
||
| + | | deck7 = |
||
| + | | deck8 = |
||
| + | | deck9 = |
||
| + | | deck10 = |
||
| + | | pet1 = |
||
| + | | pet2 = |
||
| + | | pet3 = |
||
| + | | pet4 = |
||
| + | | pet5 = |
||
| + | | pet6 = |
||
| + | | pet7 = |
||
| + | | pet8 = |
||
| + | | pet9 = |
||
| + | | pet10 = |
||
| + | | house1 = |
||
| + | | house2 = |
||
| + | | house3 = |
||
| + | | house4 = |
||
| + | | house5 = |
||
| + | | house6 = |
||
| + | | house7 = |
||
| + | | house8 = |
||
| + | | house9 = |
||
| + | | house10 = |
||
| + | | trecar1 = |
||
| + | | trecar2 = Colossus |
||
| + | | trecar3 = |
||
| + | | trecar4 = |
||
| + | | trecar5 = |
||
| + | | trecar6 = |
||
| + | | trecar7 = |
||
| + | | trecar8 = |
||
| + | | trecar9 = |
||
| + | | trecar10 = |
||
| + | | reag1 = |
||
| + | | reag2 = |
||
| + | | reag3 = |
||
| + | | reag4 = |
||
| + | | reag5 = |
||
| + | | reag6 = |
||
| + | | reag7 = |
||
| + | | reag8 = |
||
| + | | reag9 = |
||
| + | | reag10 = |
||
| + | | snack1 = |
||
| + | | snack2 = |
||
| + | | snack3 = |
||
| + | | snack4 = |
||
| + | | snack5 = |
||
| + | | snack6 = |
||
| + | | snack7 = |
||
| + | | snack8 = |
||
| + | | snack9 = |
||
| + | | snack10 = |
||
| + | | mount1 = |
||
| + | | mount2 = |
||
| + | | quest1 = |
||
| + | | quest2 = |
||
| + | | quest3 = |
||
| + | }} |
||
Revision as of 19:32, 19 October 2011
Description
Orrick Nightglider is a Wraith, found on the last floor of the Briskbreeze Tower.
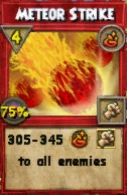
He is a boss with the cheating capability. For example, he can: cast two spells in the same round, interrupt spells, destroy traps, he can cast spells that don't use pips, cast a Meteor Strike causing 750 ![]()
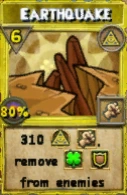
![]() and an Earthquake that does 750
and an Earthquake that does 750 ![]()
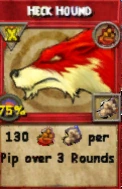
![]() . When he casts a Heck Hound, it doesn't use pips, but still does 1680
. When he casts a Heck Hound, it doesn't use pips, but still does 1680 ![]()
![]() over 3 Rounds. He can also interrupt your attacks to put a Tower Shield on himself.
over 3 Rounds. He can also interrupt your attacks to put a Tower Shield on himself.
After his health gets down to 4,000, he will summon three Stompers. Stompers are Black Colossus' that use Balance Spells, and will use all types of protections and charms on Orrick.
Your best bet to beating him is to prepare everyone in your group to each do a big attack on him killing him in one round so he won't summon the minions. While 3 people are preparing to do a big attack on him a Fire Wizard needs to put a Fire Dispel on him every round to prevent his high damage Meteor Strike and Heck Hound. He has grandmaster ring drops.
| Orrik Nightglider at a Glance: | |||||||||
 | |||||||||
|
Spells Known
Items Dropped
- Gold:
- Hats:
- Robes:
- Boots:
- Wands:
- Athames:
- Amulets:
- Rings:
- Decks:
- Pets:
- House:
- Treasure Cards:
- Reagents:
- Snacks:
- Mounts:
Quest Appearances
Hints, Guides and Discussions should be placed in the Discussion tab.
Documentation on how to edit this page can be found at Template:CreatureInfobox/doc